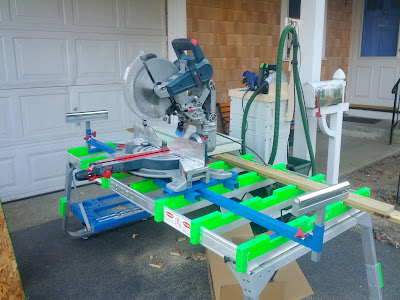
The BenchMark table is much improved with the addition of the Miter Saw Station.
 |
| The setup Miter Saw Station on the BenchMark table. |
After my initial review, BenchMark sent me their new Miter Saw Station and asked me to take a look at it. I’m embarrassed to say how long it’s taken me to open it up and put it through it’s paces, but as it’s finally become warm enough to open the table up and work in the drivechoice Ive managed to finally get the Miter Saw Station setup.
The setup took about 20 minutes. Half that time was spent looking at photos of the setup miter saw station online, since my pre-production model didnt have enclosed instructions. With instructions, it would probably have taken less than 10 minutes.
 |
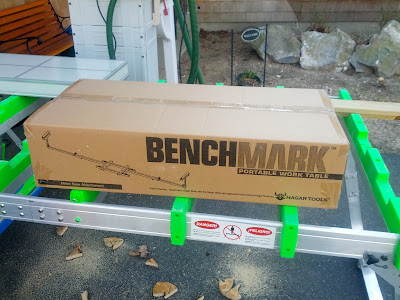
| The Miter Saw Station components come packed in single box. |
The Miter Saw Station consists of three (3) main components. The center section holds the miter saw and the two (2) outer arms hold the work supports (which are capped with rollers). The outer arms slide onto the center section and then the whole assembly locks onto the BenchMark table, fitting into the recesses in the tables cross pieces.
The stability provided to the Miter Saw Station by fitting into the recesses is surprising and impressive. Though I didnt need it, there is also a hook which locks the Miter Saw Station in and prevents it from possibly lifting.
 |
| The combination of nesting in the recesses and hooking on makes for very solid attachment. |
The miter saw is attached to the Miter Saw Station by means of two (2) rails. The rails are first bolted to the saw. Slots in the rails allow for saws with varying spacing between their front and rear attachment points. The rails then bolt to the Miter Saw Station. This time slots in the saw station allow for saws with varying widths between the left and right attachment points.
Attaching my Bosch GCM12SD miter saw to the rails using the included bolts took some nimble finger worker to get the nuts on the bolds within the tight space of the rails. Attaching the rails to the saw station was a bit easier as there was more room beneath the station than beneath the rails.
 |
| These nuts are a bit hard to reach. |
The outer arms are made of square tubing They slide over smaller square tubing which is attached to either side of the center section. The outer arms have feet with lock into the BenchMark table and prevent the Miter Saw Station from moving side to side.
 |
| The outer arms lock into the outer edge of the table. |
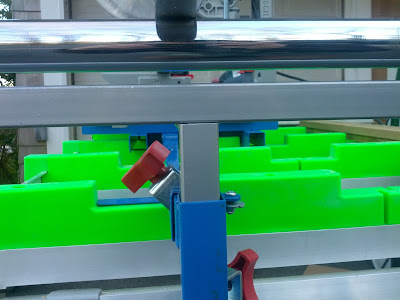
The work supports slide in and out and up and down. This is done with square tubes which fit within each other. There are locked into position with clamping teeth that push in from two (2) faces. This pushed the inner tube into a corner of the outer tube preventing it from sliding in and out and from twisting. When tightened the clamping teeth hold very tightly.
 |
| By pushing the inner square tube into the corner of the outer square tube, the clamps lock tightly. |
When I was attached the miter saw to the Miter Saw Station I tried to keep the saw square to the saw station. This was difficult, as there was no good reference to use. I thought it was important to keep the saw as square as I could because there are rollers on the top of the work supports.
As with roller supports for a table saw, the roller supports on the BenchMark Miter Saw Station will pull the work piece into or achoice from the saw fence if they’re not installed perfectly perpendicular. This is one part of the Miter Saw Station I wish BenchMark had done differently. I think low friction plastic pads such as those on Ridgid’s outfeed supports would have been much better than the rollers, because the plastic pads don’t pull the work piece in any direction, regardless of how they’re aligned.
 |
| If not aligned properly, I fear these rollers could pull the work piece in or out and mess up the cut. |
Once assembled, the Miter Saw Station allowed for quick and easy use of the miter saw. It turned the BenchMark table into a very nice portable miter saw stand. If the BenchMark table is already setup, I can not assembly and attach the Miter Saw Station in about two (2) minutes.
 |
| The fully assembled Miter Saw Station. |
When the Miter Saw Station is not assembled, I leave the center section attached to my miter saw. It raised the saw up a few inches, but the bottom of the center section is flat and stable. The bulky outer arms are a bit harder to store. For now they’re resting on my shop floor against the wall. Ultimately I’ll probably find a choice to hang them.If I were only looking for a miter saw stand, I think the BenchMark table / Miter Saw Station combination would be overkill. However, as an existing owner of the BenchMark table, the Miter Saw Station is a wonderful addition. It quickly and solidly attached to the table. It provide good support for the saw and for long workpieces. When I’m done it comes off just as easily as it went on, allowing me to keep using the BenchMark table as the awesome work surface that it is.


0 komentar:
Posting Komentar