
The first bit of proper fabrication on the Quilt Rack was to joint the feet to the legs. I did this using my Domino XL. In order to accommodate the curves they would later be shaped to, I had to use different length Dominos. This is the first time I’ve used the XL. It’s a wonderful beast. Given the size (and especially the length) of the available 14 mm Dominos, the feet should stay attached to the legs for a very long time.
 |
| Those Dominos for the Domino XL are awfully big. |
After the Dominos were mortised I assembled the leg/foot assemblies and clamped them each up with a single parallel clamp. I handled glue squeeze out using the method advocated by Marc Spagnolo, waiting about 20 minute and scraping it off after it’s initially gelled.
 |
| My roofing Barret knife makes is a great all around knife. |
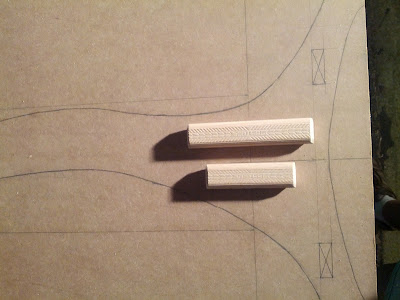
Once the leg/foot assemblies came out of the clamps, I transferred the cross member locations to the boards using my stop rules. I didn’t actually mark or transfer the Domino mortise locations, just the outline of the square (not yet rounded) cross members.
 |
| Stop rules were used to transfer the cross member locations. |
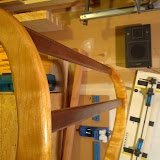
To mill the Domino mortises in the legs, I clamped a piece of wood to the leg even with the edge of the cross member to act as a fence. Then I set the base of the domino against the fence, centered it on the width of the cross member and mortised. To mortise the cross members, I used the Domino Trim Stop for Narrow Stock. Because the legs are only about ?” thick, I made the mortise deeper in the cross member than in the leg.
 |
| I clamped a block of wood to the leg to act as a fence to reference the Domino off of. |
With the joinery done, Part III will move on to shaping.
 |
| Quilt Rack Photo Gallery |

Related Posts by Categories


0 komentar:
Posting Komentar